As the leaves begin to change color across Alberta and the temperature starts to drop, it's time to prepare your home for Canada's harsh winter months. Fall is the perfect season to tackle essential maintenance tasks that will protect your investment and keep your family comfortable throughout the cold season ahead.
At Rapid Repair Services, we've helped countless homeowners in Edmonton and Calgary prepare their properties for winter. Here's our comprehensive fall maintenance checklist to ensure your home is ready for whatever Mother Nature brings.
Why Fall Maintenance Matters in Alberta
Alberta's climate presents unique challenges for homeowners in both Edmonton and Calgary. With temperatures that can plummet to -30°C and sudden weather changes, proper fall preparation isn't just recommended—it's essential. Neglecting these tasks can lead to costly emergency repairs during winter when materials are expensive and contractors are in high demand.
Exterior Fall Maintenance Tasks
1. Roof and Gutter Inspection
Your roof is your home's first line of defense against Alberta's winter weather. Before the snow flies, inspect your roof for:
- Missing or damaged shingles
- Loose flashing around chimneys and vents
- Clogged gutters and downspouts
- Ice dam prevention measures
Professional Tip: Clean gutters thoroughly and ensure downspouts direct water at least 6 feet away from your foundation. If you're uncomfortable working at heights, contact our team for professional gutter cleaning and roof inspection services in Edmonton and Calgary.
2. Exterior Caulking and Weatherstripping
Cold Alberta air can find its way through the smallest gaps, driving up your heating bills. Check and replace:
- Weatherstripping around doors and windows
- Caulking around window frames
- Gaps around exterior fixtures
- Seals around outdoor faucets
Our silicone replacement and caulking services can help seal your home against winter drafts, potentially saving you hundreds on heating costs.
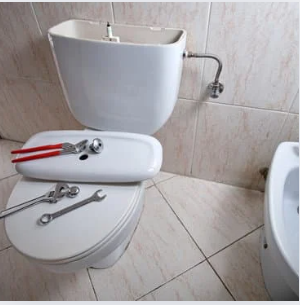
3. Outdoor Plumbing Preparation
Frozen pipes are one of the most common and expensive winter problems Alberta homeowners face. Protect your plumbing by:
- Shutting off exterior water valves
- Draining outdoor faucets and hoses
- Insulating exposed pipes
- Checking your sump pump operation
If you need assistance with plumbing winterization, our certified technicians can ensure your system is properly protected.
Interior Fall Maintenance Checklist
4. Heating System Maintenance
Your furnace will work overtime during Alberta's long winter months. Ensure it's ready by:
- Replacing furnace filters
- Testing your thermostat
- Checking for unusual noises or odors
- Scheduling professional maintenance
Our team provides thermostat installation and heating system maintenance to keep your Edmonton and Calgary homes warm and energy-efficient all winter long.
5. Safety Device Testing
Fall is the perfect time to test and replace batteries in:
- Smoke detectors
- Carbon monoxide detectors
- Security system components
With shorter days and increased use of heating systems, working safety devices are crucial. Our smoke and CO2 detector installation services ensure your family's safety throughout the winter months.
6. Interior Repairs and Touch-Ups
Address interior issues before you're stuck inside all winter:
- Repair drywall cracks that may have developed over summer
- Touch up paint on walls and trim
- Fix squeaky doors and loose handles
- Caulk around bathtubs and showers
Our drywall repair and painting services can refresh your interior spaces before the long winter months.
Electrical System Fall Check
7. Electrical Safety Inspection
Increased use of heating systems and holiday lighting puts extra demand on your electrical system. Check for:
- Flickering lights
- Warm outlet covers
- Tripped breakers
- Outdated electrical panels
Our licensed electricians provide electrical safety inspections and repairs to prevent winter electrical emergencies.
Don't Forget These Often-Overlooked Tasks
8. Window and Door Maintenance
- Test all window locks and latches
- Check for drafts around frames
- Lubricate door hinges and locks
- Consider storm door installation for added insulation
9. Basement and Foundation Care
- Check for cracks in foundation walls
- Ensure proper ventilation
- Test basement humidity levels
- Inspect for signs of water intrusion
When to Call the Professionals
While many homeowners can handle basic maintenance tasks, some jobs require professional expertise. Consider calling Rapid Repair Services when:
- Working at dangerous heights
- Dealing with electrical systems
- Major plumbing modifications are needed
- You're short on time or tools
Schedule Your Fall Maintenance Today
Don't wait until the first snowfall to discover maintenance issues. Our experienced team at Rapid Repair Services offers comprehensive fall maintenance services throughout Edmonton (including Leduc, Spruce Grove, St. Albert, and Sherwood Park) and Calgary (including Airdrie and Strathmore).
Ready to prepare your home for winter?
Edmonton Area: Book your free estimate online or call us directly
Calgary Area: Contact our Calgary franchise location
Visit rapidrepairservicesltd.com to learn more about our comprehensive handyman and repair services.
Remember, a little preparation now can save you from expensive emergency repairs later. Trust Rapid Repair Services to help keep your Alberta home in top condition all year round.
Rapid Repair Services proudly serves Edmonton and Calgary with surrounding areas, providing professional handyman and repair services. Contact us today for all your home maintenance needs.
I notice I don't have the specific phone numbers in your business information. Could you provide me with:
- The Edmonton location 587-490-0880
- The Calgary location 403-828-3370