Friday, May 31, 2024
Monday, May 20, 2024
From Tiny Tears to gaping Holes: Rapid Repair Services, Your One-Stop Shop for Drywall Dilemmas

Is your picture-perfect wall now a battleground, scarred by the shrapnel of wayward décor or the casualties of DIY dreams? Don't despair, Edmonton! At Rapid Repair Services, we're your drywall doctors, ready to heal those unsightly wounds – big or small.
Whether you're facing:
Tiny traitors: Those pesky nail holes and minor dings that seem to multiply overnight.
Major malfunctions: Large gouges or holes that threaten the structural integrity (and aesthetics) of your wall.
Rapid Repair Services has the cure!
Here's why you should ditch the spackle and call the drywall specialists:
From Patch to Perfection: Our technicians are battle-tested veterans when it comes to drywall repair. No hole is too big, no ding too small. We use top-of-the-line materials and proven techniques to ensure a flawless finish that blends seamlessly with your existing wall.
DIY Disaster Averted: We know patching drywall can be a messy, time-consuming project. Between hunting down materials, figuring out the right steps, and achieving a professional look, it's enough to make anyone throw their hands up. Let Rapid Repair Services take the reins! We'll handle everything, from prepping the area to applying the finishing touches, saving you precious time and frustration.
Peace of Mind Patchwork: Our repairs are more than just skin deep. We take pride in our quality workmanship, and your satisfaction is our guarantee. With Rapid Repair Services on the job, you can rest easy knowing your walls are back to their tip-top shape, and will stay that way for years to come.
Don't Let Drywall Damage Get You Down
A damaged wall can be a constant eyesore, dragging down the entire ambiance of a room. But with Rapid Repair Services, a quick call is all it takes to restore your walls to their former glory. Contact us today for a free quote and let our experts banish those unsightly blemishes for good!
But for the truly DIY-determined souls out there, here's a quick rundown of the patching process for small holes:
Gather your supplies: Putty knife, joint compound (spackle), fine-grit sandpaper, and a damp rag.
Prep the area: Use the putty knife to scrape away any loose debris around the hole.
Apply and smooth the spackle: Fill the hole with joint compound using your putty knife, ensuring it's level with the wall surface. Wipe away any excess with the damp rag.
Let it dry: Follow the manufacturer's drying instructions, typically 24hrs.
Sanding is key: Once dry, use fine-grit sandpaper to smoothen the area until it blends seamlessly with the wall.
For larger holes or for a guaranteed professional finish, remember – Rapid Repair Services is just a call away!
Monday, May 13, 2024
The Throne Room Upgrade: A DIY Guide to Toilet Installation (and When to Call in the Royal Flushers)
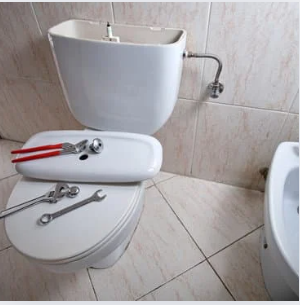
The humble toilet – a throne in every home, a silent guardian of comfort and convenience. But when yours starts acting up, it can quickly turn your bathroom into a royal plumbing nightmare. So, you might be considering a DIY toilet installation to save some cash. While it's possible for the handy homeowner, this porcelain palace requires a careful touch. Here's a guide to navigating the process, but remember, knowing when to call in the pros is key!
When to Call in Rapid Repair Services, Your Plumbing Knights:
The Great Leak: If the mere thought of wrenches and wax rings sends shivers down your spine, or if you've already encountered a leaky situation, don't hesitate to call in Rapid Repair Services. Our Technicians are the leak-slaying knights you need to keep your bathroom oasis dry and functional.
The Plumbing Labyrinth: Older homes can have hidden plumbing mysteries. If your toilet installation involves unforeseen complications, Rapid Repair Services' experienced technicians can navigate the labyrinth and ensure a secure and proper installation.
The DIY Disaster Zone: Maybe you've started the installation and realized it's a bit more than you bargained for. No shame in that! Our friendly professionals can assess the situation, fix any DIY mishaps, and complete the installation efficiently.
For the Brave DIYer: A Guide to Toilet Throne Takeover (Installation)
Safety First!
Turn off the water supply valve behind the toilet. If you can't locate it, consult a plumber – this is non-negotiable!
Flush and empty the toilet bowl.
Disconnect the water supply line with an adjustable wrench. Be prepared for spills and have a rag handy.
Farewell, Old Throne:
Carefully unbolt the toilet from the floor flange with a wrench.
Lift the toilet straight up and away, placing it aside for disposal (check local regulations).
Remove any old wax ring residue with a putty knife (optional). The floor flange should be clean and smooth.
Enter, the New Royal Restroom Resident:
Place the new wax ring on the flange, centering the hole.
Carefully lower the toilet bowl onto the flange, ensuring the wax ring forms a seal.
Insert the toilet bolts, washers, and nuts, tightening them with a wrench (don't over-tighten!).
Reattaching the Royal Water Supply:
Install the toilet tank according to the manufacturer's instructions.
Connect the water supply line to the shut-off valve using the appropriate wrench or tool. Follow the manufacturer's instructions for your specific setup.
The Final Touches:
Turn on the water supply slowly and check for leaks.
Flush the toilet and check for leaks around the base. If leaks occur, reconsider your DIY prowess or call in Rapid Repair Services!
Attach the toilet seat and lid according to the manufacturer's instructions.
Congratulations! You've (hopefully) conquered the porcelain palace and given your bathroom a fresh start. But remember, this is just a general guide. If anything seems daunting, don't hesitate to call in the experts!
Rapid Repair Services: Your One-Stop Shop for a Stress-Free Throne Room
Our Technicians at Rapid Repair Services have the expertise and experience to handle any toilet installation, big or small, simple or complex. We prioritize efficiency, ensuring your new toilet is installed quickly and correctly, minimizing disruption to your home. Plus, we back our work with a guarantee, giving you peace of mind that your throne room is in good hands.
So, if you're looking for a smooth and stress-free toilet installation, don't hesitate to contact Rapid Repair Services. We'll ensure your bathroom kingdom is leak-free and functioning flawlessly, ready for your royal reign of comfort!
Sunday, May 5, 2024
Bright Ideas: DIY Light Fixture Installation or Pro Help?

The light flickers, sputters, and dies. You know it's time to replace that outdated (or flickering) light fixture. A quick web search shows countless DIY tutorials, and suddenly you're picturing yourself as a home improvement hero. But hold on! Before you grab the screwdriver, consider the benefits of calling in a pro like Rapid Repair Services.
The DIY Appeal
Let's be honest, there's a certain satisfaction in tackling a home project yourself. Saving money and the pride of accomplishment are both attractive. However, electrical work can be more complex than it seems in a YouTube video.
When to Call Rapid Repair Services
- Electrical Safety: Even a minor mistake can lead to a shock hazard or fire. Rapid Repair Services' technicians are trained and licensed to ensure safe electrical installations.
- Complex Wiring: Modern fixtures can have multiple wires and require specific connections. A pro can handle it efficiently and avoid any confusion.
- Hidden Issues: Older electrical systems may have unseen problems. A qualified electrician can identify and address these before they become bigger issues.
- Fixture Expertise: Not all fixtures are always created equal. Rapid Repair Services' technicians can advise on the best fixture for your needs and ensure proper installation for optimal performance.
- Peace of Mind: Knowing the job is done right and comes with a guarantee is priceless. Rapid Repair Services offers warranties on their work for your peace of mind.
DIY Light Fixture Installation (For the Brave at Heart)
If you're comfortable with electrical work and set on a DIY approach, here's a general roadmap. Remember, this is a simplified overview, and consulting a professional electrician is always recommended, especially for complex fixtures or older wiring.
- Safety First! Turn off the power to the fixture at the breaker box and use a voltage tester to confirm no electricity is present.
- Prepare the Workspace: Gather your tools (screwdriver, wire strippers, pliers) and lay out the new fixture's parts.
- Remove the Old Fixture: Carefully detach the old fixture, noting how the wires were connected.
- Install the New Fixture: Following the manufacturer's instructions, attach the mounting plate, connect the wires using wire nuts (matching colors!), and secure the fixture to the box.
- Reassemble and Test: Attach the shade/globe(s) and bulbs, then turn the power back on at the breaker box. Test the new fixture to ensure it works properly.
Don't be left in the dark! While the DIY route can be tempting, Rapid Repair Services offers a safe, efficient, and guaranteed solution. Contact them today for a free consultation and let their experts brighten your home the right way.
Friday, May 3, 2024
Tuesday, April 30, 2024
Don't Get Blown Away by DIY Disasters: Why Pro Storm Door Installation is Key for Edmonton Homes
.png)
The crisp Edmonton air, the vibrant changing seasons – there's a lot to love about living in Alberta's capital. But harsh weather can quickly turn your haven into a battleground against the elements. A well-installed storm door acts as a shield, protecting your main door and enhancing your home's comfort and efficiency. While DIY storm door installation might seem tempting, here's why calling in the pros at Rapid Repair Services in Edmonton is the smarter and safer choice:
The Risks of DIY Storm Door Installation:
-
Improper Placement: Storm doors need precise positioning for optimal functionality. DIY installation might miss the mark, leaving gaps that defeat the purpose of the door and potentially causing damage to your main door. Our certified technicians ensure storm doors are installed correctly based on your specific door and entryway.
-
Weatherproofing Woes: A secure seal around the storm door is crucial to keep out drafts and moisture. DIY installation might overlook crucial weatherproofing steps, leading to energy inefficiency and potential water damage. Our professionals use high-quality weather stripping materials and techniques to ensure a tight seal that keeps your home comfortable and protected.
-
Door Disasters: Storm doors come in various sizes and styles. DIY selection and installation can lead to a door that doesn't fit properly, swings awkwardly, or clashes with your home's aesthetics. Our team will help you choose the ideal storm door size, style, and material based on your needs and entryway measurements.
-
Safety Concerns: Storm doors involve working at heights and using power tools. DIY installation can be risky, especially for older adults or those without experience. Our certified technicians prioritize safety and have the proper equipment to handle installation efficiently and securely.
-
Hidden Hassles: Older homes might have unforeseen complications like uneven door frames or outdated hardware. DIY installation might lead to frustrating delays or require additional purchases you weren't prepared for. Our experienced technicians can handle these challenges efficiently, ensuring a smooth and successful installation.
The Benefits of Pro Storm Door Installation with Rapid Repair Services:
-
Fast and Efficient: Our rapid response service means you won't have to wait long to enjoy the benefits of your new storm door. We work quickly and efficiently, minimizing disruption to your daily routine.
-
Guaranteed Quality: We use high-quality storm doors and back our work with a guarantee, ensuring your door functions flawlessly and protects your home for years to come.
-
Peace of Mind: Knowing your storm door is installed correctly and securely by professionals gives you peace of mind and allows you to focus on enjoying the increased comfort and energy savings it provides.
-
Expert Advice: Our team can help you choose the right storm door type for your needs, considering factors like insulation, ventilation, security features, and style.
-
Year-Round Comfort & Savings: A pro-installed storm door provides year-round benefits. In the summer, it reduces heat gain and protects your main door from sun damage. In the winter, it provides an extra layer of insulation, keeping your home warmer and lowering your energy bills.
Invest in Your Home's Comfort and Efficiency Today!
Don't let DIY storm door installation turn into a blustery headache. Contact Rapid Repair Services in Edmonton today! Our friendly and professional team will take care of everything, from selecting the perfect storm door to flawless installation. We'll ensure your home is well-protected against the elements, keeping you comfortable and saving you money year-round.
Monday, April 29, 2024
Bright Ideas for Your Home: A DIY Guide to Light Fixture Installation (and When to Call in the Pros)

The right lighting can transform a room, setting the mood and showcasing your style. Upgrading your light fixtures is a relatively simple DIY project that can yield big results. But before you grab the screwdriver and head to the hardware store, it's important to prioritize safety. If you're even a little unsure about electrical work, enlisting a licensed electrician is the smartest move.
This guide is here to empower the DIY enthusiast with some basic electrical knowledge. Follow along as we navigate the installation process, but remember, safety is paramount.
When to Shine a Light on a Pro (Rapid Repair Services!)
Electrical Jitters: If working with electrical wiring makes you nervous, don't hesitate to call in a pro. A licensed electrician from Rapid Repair Services has the expertise and experience to ensure a safe and secure installation.
Complex Fixtures: Beautiful, modern light fixtures can sometimes have intricate wiring configurations. If the installation instructions leave you scratching your head, it's best to call in a professional to avoid any mishaps.
Hidden Hazards: If you encounter any unexpected issues like damaged wiring or a faulty breaker box, stop immediately and contact a licensed electrician. They can diagnose the problem and ensure your safety.
Let's Get Lit: A Step-by-Step Guide to Light Fixture Installation
Safety First!
Power Down: This is non-negotiable. Turn off the power to the circuit controlling the light fixture at the breaker box. Double-check with a voltage tester to confirm no current is flowing before you proceed.
Gather Your Supplies:
Screwdriver (flathead and Phillips)
Wire strippers
Pliers (optional)
Voltage tester
New light fixture (including mounting hardware and instructions)
Replacement light bulbs (appropriate wattage for the fixture)
Ladder (if necessary)
Time to Shine (Literally):
Farewell, Old Friend: Following the manufacturer's instructions, carefully remove the old light fixture. Be cautious of any broken glass or sharp edges.
Mounting the New Masterpiece: Identify the correct mounting plate for your new fixture (consult the instructions if needed). Using the provided hardware, securely attach the plate to the electrical box in the ceiling. Tighten the screws firmly, but avoid over-tightening.
Wrangling the Wires: Inside the electrical box, you'll find three wires: black (hot), white (neutral), and bare copper (ground). Strip about ½ inch of insulation from the ends of each wire using the wire strippers.
Connecting the Stars: Match the colors of the fixture wires to the corresponding wires in the electrical box. Typically, black to black, white to white, and bare copper to bare copper.
Pro Tip: Many light fixtures use twist-on wire connectors (wire nuts) for easy and secure connections. Twist the bare ends of the corresponding wires together tightly, then screw on the appropriate sized wire nut until snug. Ensure no loose strands are visible.
Ground Control: Double-check that the bare copper ground wire from the fixture is securely connected to the bare copper ground wire in the electrical box using a twist-on connector. Proper grounding is essential for safety.
Light It Up! Carefully lift the fixture and align the mounting screws with the holes in the mounting plate. Secure the fixture to the plate using the provided screws. Tighten them firmly but avoid over-tightening.
Bulb Beautiful: Screw in the light bulbs according to the fixture's recommended wattage. Do not exceed the recommended wattage to avoid overheating or fire hazards.
Power On! Turn the power back on at the breaker box. Turn on the light switch and bask in the warm glow of your accomplishment!
Congratulations! You've successfully installed your new light fixture and brightened your space. Now, sit back, relax, and enjoy the ambiance.
But Remember: Safety is key. If you're ever unsure about any step in the process, don't hesitate to call in the lighting experts!
Rapid Repair Services: Your Knights in Shining Armor
The friendly professionals at Rapid Repair Services are here to help you with all your electrical needs. From simple light fixture installations to outlet and switch replacement, our highly trained Technicians have the expertise and experience to ensure a safe and successful outcome.
So, if you ever find yourself in over your head, don't be afraid to reach out. We're just a call away, ready to help your home shine bright!
Saturday, April 27, 2024
Tuesday, April 23, 2024
Why Letting the Pros at Rapid Repair Service Handle Your Window Screens Makes Perfect Sense

Spring has sprung! Birds are chirping, flowers are blooming, and...wait, is that a mosquito buzzing past your ear? Don't let unwanted insects and a stuffy house put a damper on the beautiful season. It's time to breathe easy with fresh air and a pest-free haven – and that all starts with replacing your worn-out window screens.
But hold on before you dig out that dusty toolbox. While replacing window screens might seem like a simple DIY project, there are many benefits to calling in a professional like Rapid Repair Service. Here's why:
- Expert fit, guaranteed: Window sizes can vary slightly, and a screen that's even a fraction of an inch off can leave gaps – defeating the purpose entirely! Rapid Repair Service technicians have the experience and tools to ensure your new screens fit perfectly, creating a seamless barrier against pests and debris.
- The right screen for your needs: Not all screens are created equal. Rapid Repair Service offers a variety of screen materials to meet your specific needs. From pet-proof mesh for your furry friends to solar screens that block UV rays and keep your home cooler, they'll help you choose the perfect option for optimal comfort and protection.
- Fast and efficient service: Let's face it, your weekends are precious. Save yourself the hassle of measuring, cutting, and wrestling with finicky screen material. Rapid Repair Service offers prompt and efficient service, often completing screen replacements in a single visit.
- Peace of mind: Professional installation comes with peace of mind. Technicians at Rapid Repair Service will ensure your screens are securely fastened, eliminating the worry of them popping out on a windy day.
Beyond Convenience: The Value of Professionalism
While a DIY approach might seem cost-effective at first glance, consider the hidden costs. A poorly measured or installed screen could lead to tears, rips, or improper fit, requiring a whole new screen (and another trip to the hardware store).
Rapid Repair Service offers competitive pricing and guarantees their work. Plus, their expertise helps ensure your new screens last for years to come, saving you money in the long run.
Ready to Breathe Easy and Enjoy a Pest-Free Spring?
Don't let worn-out window screens hold you back from enjoying the beautiful season. Contact Rapid Repair Service today for a free quote and experience the difference professional window screen replacement can make. Breathe easy, keep the bugs out, and spend more time soaking up the sunshine – that's the promise of Rapid Repair Service.
Call Rapid Repair Service now at 780-802-1418 and breathe easy this spring!
Saturday, April 20, 2024
Discover Why We Are Edmonton's Number 1 Handyman Service.
Visit Us Online. https://rapidrepairservicesltd.com
Power Up Your Home: A Guide to Replacing an Electrical Outlet
.png)
A flickering light or a dead outlet can be a real drag, especially when you need to charge your phone or power up your favorite appliance. While tackling electrical work yourself can be tempting, safety should always be the top priority. If you're not comfortable tinkering with wires, then calling a licensed electrician is the smartest move.
But for the DIY enthusiasts out there, here's a helpful guide to replacing an electrical outlet:
Safety First!
Electrical work requires caution. Before you even touch the outlet, make sure the power is off. Head to your breaker box and flip the switch that controls the outlet you'll be replacing. Double-check for any remaining current with a voltage tester for ultimate peace of mind.
Out with the Old...
Once the power is off, take a screwdriver to remove the faceplate from the wall. Then, you'll find screws holding the outlet in place. Unscrew them carefully and gently pull the outlet out of the electrical box to expose the wires.
Wire Work: Take it One Step at a Time
Here's where things get a bit more intricate. Notice the colors and positions of the wires on the old outlet (typically black, white, and bare copper or green). They should be attached to screws. Here's the key: don't disconnect all the wires at once! It's much safer to tackle them one by one. Disconnect a single wire, attach it to the corresponding terminal on the new outlet (refer to the color codes: black to brass screw, white to silver screw, and bare copper or green to the green screw), and then move on to the next wire.
New Outlet, New Life!
Now that you've carefully connected the wires, ensure they're secure and snug. Wrap them with electrical tape for an extra layer of safety. Push the new outlet back into its electrical box and secure it with the mounting screws.
Finishing Touches
Almost there! Attach the new faceplate and screw it in place. Head back to the breaker box and turn the power back on. Finally, test the outlet with a plug to make sure everything is functioning properly.
Not Feeling Electrified About DIY?
We get it. Electrical work can be daunting, and that's perfectly okay! If you'd rather have a professional handle the job, consider calling Rapid Repair Services. Their Technicians are experts in all things electrical, and they'll ensure your outlet replacement is done safely and efficiently.
Rapid Repair Services offers prompt, reliable service, and their team is always happy to answer any questions you might have. They prioritize customer satisfaction, so you can rest assured you're in good hands.
Remember, safety is key when it comes to electrical work. If you're not 100% confident in your DIY skills, don't hesitate to call in the professionals at Rapid Repair Services. They'll get your outlets sparking back to life in no time!
Monday, April 15, 2024
Upgrading Your Kitchen? Here's How to Install a New Faucet Yourself (And When to Call in the Pros)
.png)
A faucet is a kitchen workhorse, enduring countless splashes and providing a steady stream of water for all your culinary needs. But sometimes, a faucet can become leaky, malfunctioning, or simply outdated. Replacing your faucet with a new one can breathe new life into your kitchen and enhance its functionality.
The good news? Installing a new faucet can be a manageable DIY project, as long as you have the right tools and know-how. This guide will walk you through the steps involved in faucet installation, and help you decide when it's best to call in a professional.
Before You Begin
Turn off the water supply: Locate the shut-off valves for hot and cold water supply lines under your sink and turn them clockwise until they stop.
Clear workspace: Empty your undersink cabinet to create ample space for maneuvering.
Gather your tools: Adjustable wrenches, screwdrivers, plumber's tape, bucket, and rags should do the trick.
DIY Faucet Installation: A Step-by-Step Guide
Disconnect the Old Faucet:
There are two main faucet types: centerset (two handles) and single-handle. The removal process differs slightly:
Centerset: Use adjustable wrenches to disconnect the water supply lines from the faucet tailpipes. Then, loosen and remove the mounting nut holding the faucet in place from underneath the sink.
Single-handle: These faucets often have built-in supply lines. Follow the manufacturer's instructions for detaching them from the base of the faucet.
Remove the Old Faucet: Once the connections are loose, lift the faucet out of the sink hole.
Install the New Faucet:
Deck plate (if applicable): This is the base that sits on the sink around the faucet. Place it according to the manufacturer's instructions.
Feed the faucet lines: Thread the faucet's water lines through the designated hole in the sink.
Secure the faucet: From below the sink, slide the faucet into place and secure it with the mounting hardware, typically a nut and washer, following the manufacturer's guide.
Connect the Water Supply Lines:
Plumber's tape: Wrap the threads of the water supply lines with plumber's tape to ensure a watertight seal.
Attach the connections: Connect the lines to the corresponding hot and cold water supply valves under the sink. Tighten them securely with wrenches, but avoid overtightening.
Turn on the Water and Check for Leaks:
Slowly turn on the water supply valves under the sink.
Inspect for leaks: Carefully examine the base of the faucet and connections for any leaks. Tighten any loose connections as needed.
Test the Faucet:
Turn on the handles and check for proper water flow and temperature control.
Spray function (if applicable): Test the spray function for leaks and proper operation.
When to Call Rapid Repair Services
While faucet installation can be a DIY project, some situations call for a professional touch. Here's when it's best to enlist the expertise of Rapid Repair Services:
Complex plumbing systems: If your plumbing system is intricate or you're unsure about its layout, it's wiser to leave the job to a pro.
Limited time or DIY skills: If you're short on time or lack confidence in your DIY abilities, Rapid Repair Services can take care of the installation quickly and professionally.
Rapid Repair Services: Your One-Stop Shop for Faucet Installation
Rapid Repair Services is your trusted partner for all your faucet installation needs. Our licensed technicains are highly skilled and experienced, ensuring a flawless installation that meets all safety standards. We understand the importance of efficiency and will complete the job promptly, minimizing disruption to your daily routine.
So, whether you're looking to upgrade your kitchen faucet or need help with a leaky connection, Rapid Repair Services is here to assist you. Contact us today for a free consultation and experience the difference of exceptional service!
Sunday, April 14, 2024
Thursday, April 11, 2024
Edmonton's Superhero of Home Repair: Why Rapid Repair Services Reigns Supreme with Integrity, Customer Focus, and Innovation
.png)
Tired of weekend warrior projects turning into week-long sagas? Edmonton, there's a better way! Rapid Repair Services swoops in like a handyman hero, saving you from frustration and getting your home repairs done right, fast. Here's why they're Edmonton's undisputed champion:
Speed and Expertise: No More DIY Disasters
Forget YouTube tutorials and trips to the hardware store for that missing widget. Rapid Repair boasts a team of expert handymen who arrive prepared to tackle any task, from faucet repair to smart home technology installation. Their experience ensures efficient service, saving you precious time and money.
Your Complete Home Fixit Fixers
Say goodbye to calling multiple companies for different jobs. Rapid Repair Services offers a comprehensive range of handyman services, including:
Plumbing: Leaky faucets, rogue toilets, clogged drains – they've got the plumbing wrangled.
Electrical: Flickering lights, buzzing outlets? Our electricians bring the zap back to your home (safely, of course!).
Carpentry: Creaky doors, damaged baseboards – our carpentry crew can build, fix, and install with finesse.
Interior Champions: Drywall dings, lackluster paint? We'll revive your space with flawless repairs and stunning finishes.
And More! From window repair to shelving installation, Rapid Repair Services is your one-stop shop for home improvement.
Quality Over Quick Fixes: Edmonton Deserves the Best
Rapid Repair isn't about sticking a bandaid on your home's problems. Our skilled technicians diagnose issues thoroughly, providing long-lasting solutions that prevent future headaches. Integrity is at the core of everything they do, ensuring honest and ethical service.
Edmonton's Handyman Heroes: Convenience You Can Trust
We understand your time is valuable. That's why Rapid Repair Services prioritizes prompt scheduling, clear communication, and spotless clean-up. They'll treat your home with respect, leaving you with zero mess and a perfectly fixed space. Their customer-centric approach ensures your needs are met and satisfaction is guaranteed.
Edmonton & Beyond: Your Local Handyman Powerhouse
Rapid Repair Services is proud to serve Edmonton and surrounding areas, including Leduc, Sherwood Park, St. Albert, and Beaumont. So, no matter where you're located, their superhero handymen are ready to bring their expertise to your doorstep.
A Team Built on Innovation and Sustainability
Rapid Repair Services is a company that embraces innovation. Their team is constantly seeking new and better ways to serve their customers, utilizing the latest tools and techniques. They are also committed to sustainability, minimizing environmental impact whenever possible.
Stop the frustration, Edmonton! For superior handyman services built on integrity, customer focus, and innovation, trust the Rapid Repair Services team. Contact them today for a free quote and experience the difference a true Edmonton handyman hero can make!
Edmonton's Superhero of Home Repair: Why Rapid Repair Services Reigns Supreme

Tired of weekend warrior projects turning into week-long sagas? Edmonton, there's a better way! Rapid Repair Services swoops in like a handyman hero, saving you from frustration and getting your home repairs done right, fast. Here's why they're Edmonton's undisputed champion:
Speed and Expertise: No More DIY Disasters
Forget YouTube tutorials and trips to the hardware store for that missing widget. Rapid Repair boasts a team of expert handymen who arrive prepared to tackle any task, from faucet repair to smart home technology installation. Their experience ensures efficient service, saving you precious time and money.
Your Complete Home Fixit Fixers
Say goodbye to calling multiple companies for different jobs. Rapid Repair Services offers a comprehensive range of handyman services, including:
Plumbing: Leaky faucets, rogue toilets, clogged drains – they've got the plumbing wrangled.
Electrical: Flickering lights, buzzing outlets? Our electricians bring the zap back to your home (safely, of course!).
Carpentry: Creaky doors, damaged baseboards – our carpentry crew can build, fix, and install with finesse.
Interior Champions: Drywall dings, lackluster paint? We'll revive your space with flawless repairs and stunning finishes.
And More! From window repair to shelving installation, Rapid Repair Services is your one-stop shop for home improvement.
Quality Over Quick Fixes: Edmonton Deserves the Best
Rapid Repair isn't about sticking a bandaid on your home's problems. Our skilled technicians diagnose issues thoroughly, providing long-lasting solutions that prevent future headaches.
Edmonton's Handyman Heroes: Convenience You Can Trust
We understand your time is valuable. That's why Rapid Repair Services prioritizes prompt scheduling, clear communication, and spotless clean-up. They'll treat your home with respect, leaving you with zero mess and a perfectly fixed space.
Edmonton & Beyond: Your Local Handyman Powerhouse
Rapid Repair Services is proud to serve Edmonton and surrounding areas, including Leduc, Sherwood Park, St. Albert, and Beaumont. So, no matter where you're located, their superhero handymen are ready to bring their expertise to your doorstep.
Stop the frustration, Edmonton! For superior handyman services, trust the Rapid Repair Services team. Contact them today for a free quote and experience the difference a true Edmonton handyman hero can make!
Essential Fall Home Maintenance Checklist for Edmonton & Calgary Homeowners
As the leaves begin to change color across Alberta and the temperature starts to drop, it's time to prepare your home for Canada's...

-
 Thinking about upgrading your doors? Whether you're replacing a worn-out door or adding a new one to a fresh opening, proper measurem...
 -
 Is your picture-perfect wall now a battleground, scarred by the shrapnel of wayward décor or the casualties of DIY dreams? Don't despa...
